Tag: gluten free

Warm Butternut Squash Salad

Warm butternut squash: this is a delicious holiday treat for those first cold days that signal the end of fall. It’s a hit at special dinners. It’s very filling and makes you feel warm inside even though it’s a salad. It’s also very healthy and vegan. – Veronica

DOWNLOAD PDF

warm butternut salad

TOTAL 30 minutes

Serving Size: 2-4 people

Ingredients

Warm butternut squash

  • 1 Tablespoon coconut oil
  • 1/4 cup diced sweet or yellow onion
  • 1 small butternut squash,
seeded and diced
  • 1 clove garlic, minced or pressed
  • 1/2 teaspoon ground nutmeg
  • 1/2 teaspoon fresh thyme leaves
  • 1 cup cooked quinoa
  • Sea salt, to taste
  • Freshly ground black pepper
  • 4 cups wild greens (arugula, spinach, or mixed herbs)
  • 1 cup pomegranate seeds

Directions

Warm butternut squash: In a large non-stick pan, heat the coconut oil over medium heat. Add the diced onion and butternut squash. (The smaller the squash is diced the more quickly it will cook.) Sauté the squash and onions over medium heat for about 5 minutes, or until the squash is soft. Do not burn the squash or onions.

Add the garlic, nutmeg and thyme, and cook for 1 to 2 minutes more. Transfer the butternut squash to a bowl and stir in the cooked quinoa. Add salt and pepper to taste. Cool mixture in the refrigerator.

To serve, mix the dressing ingredients and drizzle over greens. Top with cooled butternut squash mix and garnish with pomegranate seeds. Serves 2-4.

White Sweet Potato Purée

Everyone loves mashed potatoes. But regular mashed potatoes are very starchy. That means the starch quickly converts into sugar. That’s more bad news for your gut. But this healthy recipe for mashed potatoes uses the nutritiously-superior white sweet potato. Instead of regular milk, I use almond or coconut milk.

I swear to you that my white sweet potato pureé will have the same starchy mouth-feel as regular mashed potatoes. But this version contains way more minerals and is lower in calories. – Veronica

sweet potato puree

TOTAL: 1 hour

Serving Size:2

Ingredients

  • 1 large white sweet potato, peeled and chopped
  • 3 cups filtered water
  • 1/4 cup Chef V’s Raw Almond Milk or coconut milk
  • 1/4 teaspoon sea salt
  • 1/4 teaspoon cayenne pepper, optional
  • 1/4 teaspoon red pepper flakes, optional

Directions

Boil the sweet potato pieces in the 3 cups of water in a large pot for 15 minutes, or until soft. Transfer the pieces to a Vitamix and add the milk, sea salt, cayenne, and red pepper flakes, and process until smooth. Serve immediately or keep refrigerated for up to 1 week.

Chef V’s Cooking with V – Salmon Beurre Blanc

Welcome to Chef V's Cooking School!

I'm Veronica, Certified Nutritional Therapist, author, and proud owner of Chef V. You might know me for my Green Drink and Cleanses, but I started Chef V as a personal chef. In my first video cooking series, I'll be sharing some of my clients' favorite recipes with you.

Using this blog and my YouTube channel, I welcome you to my kitchen. We're going to laugh, learn and cook – together.

This month we are making Salmon with Beurre Blanc Sauce, with my friend Maddi assisting.

Cooking with Chef V

Maddi is a friend and customer of Chef V. In 2017 she had a massive stroke, and has worked incredibly hard to recover. I'm honored to know her and to support her in eating healthy – and delicious. – Veronica

Maddi

SALMON BEURRE BLANC DIRECTIONS
Watch Veronica make the recipe in the video above

salmon beurre blanc

INGREDIENTS

for sauce:

  • 1 shallot (about 2-3 tbsp.) finely minced
  • 1/4 cup lemon juice
  • 1/2 cup dry white wine
  • 6 tbsp. vegan butter
  • Salt & pepper to taste

For salmon and pasta:

  • 1 package lentil, quinoa, or brown rice pasta
  • 2 tbsp. olive oil
  • 1 tbsp. lemon juice
  • 2 4-6oz wild salmon fillets – rest to room temperature
  • 1 tbsp. chopped parsley (for garnish)
  • Salt & pepper to taste

DIRECTIONS

quinoa enchilada ingredients

PREPARE THE INGREDIENTS

1. SHALLOT
Finely dice the shallot, slicing lengthwise and then chopping on its side. Save in a small bowl.

mise en place chopped

2. PARSLEY
Roll the fresh parsley loosely into a ball, then chop that up and throw that garnish into a small bowl.

salmon beurre blanc pasta

3. LEMON
Juice the lemon and save in a small bowl.

boil water

PREPARE THE PASTA

1. Bring the water to a boil with one tsp olive oil and a pinch of salt.

boil water

2. Rip the dry pasta in half, adding it to the boiling water.

salmon cooking

GRILL THE SALMON

Sprinkle salmon with salt and pepper. Heat Grill pan or pan to medium high heat.

When the pan is hot, place the salmon in the pan with the skin side up, cook the salmon for 3 minutes on each side, and remove when still pink in the middle.

It is easy to cook something more, but you can't undo an overcooked piece of salmon! Remove salmon and let rest.

making the sauce

making the sauce

MAKE THE BEURRE BLANC SAUCE

To cook the sauce add white wine, shallot and lemon juice to a medium heat saucepan and reduce to half. Slowly add one tbsp. of vegan butter at a time and whisk to create a thick sauce.

final recipe

ASSEMBLE THE DISH

Drain the pasta and place a portion on a plate. Place the salmon right on top. Then we take the beurre blanc sauce and pour it over the salmon and the pasta.

final recipe

NOW THE BEST PART – THE TASTE TEST!

Brandon says “mmmm… – that Beurre Blanc sauce – the lemon and the wine! Who knew eating healthy could be fun.”

Maddi says “it's delicious” – and her sous chef Dad says “nice and light and delicious!”

Making Bone Broth

I’m not a strict vegetarian, but I rarely promote meat. One rare exception is bone broth because it contains collagen protein. The process of slow cooking bones for many hours releases collagen from the bones. By consuming the collagen from animal bones, you’re helping revitalize your own body’s collagen.

Creamy Curry Pumpkin Soup

The only thing more comforting than a bowl of soup is a bowl of homemade soup that is both vegan and gluten-free. There’s something special about cooking comforting meals like this during the Fall that will warm you up and have your kitchen smelling festive.

Cozy up with someone you love and enjoy this delicious pumpkin soup on a cool fall night! – Veronica

vegan ambrosia salad

Serving Size:2

Ingredients

  • 1 tbsp. olive oil
  • 1 yellow onion, diced
  • ½ cup organic Crimini mushrooms, sliced
  • 1 clove garlic
  • 1 tsp. curry powder
  • 1 ½ tbsp. gluten-free flour (we like Bob’s Red Mill)
  • 3 cups organic vegetable broth
  • 2 cups Chef V’s Organic Pumpkin Puree (see recipe HERE)
  • ½ cup of canned coconut milk
  • 1 tsp. nutmeg
  • 1 tsp organic sea salt
  • ½ tsp. black pepper

Directions

Bring oil to medium high heat and saute onion and mushrooms for 3 minutes or until onions are translucent.

Add garlic, curry powder and gluten-free flour to the pan to continue to cook for one more minute.

Slowly add the vegetable broth and bring to a boil.

Cook and stir for a couple of minutes until the soup starts to thicken.

Add the pumpkin puree, coconut milk, nutmeg, salt and pepper.

Continue to stir and cook for an additional 5 minutes.

Blend small batches of soup in a Vitamix or blender to a get a smooth texture and serve hot.

Vegan & Gluten-Free Pumpkin Pie

My oh my, pumpkin pie … how I love thee,
But how you seem to hate my belly.
For each sinfully delicious bite I take,
Your sweet and milky richness makes my tummy ache.
Is there a way to make you more nutritious,
All the while keeping you equally delicious?
The good news is yes there is,
And showing you how is my biz. (Mic drop)

Bon Appétit! – Veronica

pumpkin pie

My pumpkin pie recipe is better for your health because it contains low-glycemic coconut sugar and dairy-free coconut whipped cream. It is gluten-free.

Ingredients

chia seed egg substitute

Directions

Mix sugar, pie spice, salt, egg substitute and pumpkin puree in a large mixing bowl. Slowly add almond milk.

Press pie crust into a 9-inch baking pie dish. Pour the pumpkin mix into the pie crust.

Bake 450-degree oven for 15 minutes. Reduce the heat to 350 degrees and bake for an additional 40 minutes.

Cool on wire rack for 20 minutes. Serve immediately with my Coconut Whip Cream Recipe or refrigerate.

Gluten-Free Pie Crust

Gluten-free pie crust – my recipe is so good you can use it for any pie recipes, sweet or savory. It’s a keeper! – Veronica

chia seed egg substitute
gluten free pie crust

Ingredients

  • 2 cups gluten-free flour (I like Bob’s Red Mill)
  • 2 tbsp. raw coconut sugar
  • ½ tsp. organic sea salt
  • 1 tbsp. Chef V’s Chia Seed Egg Substitute
  • 1/3 cup water (add tbsp. more at a time if to dry)
  • 1-cup organic unsweetened almond milk

Directions

Preheat oven for 450°F. In a large mixing bowl, mix flour, salt and sugar. Add coconut oil and mix until crumbly.

Add egg substitute and mix in well, mixture should still be crumbly. Add water by stirring in one tablespoon at a time until the dough holds together for rolling. It is better to be more moist than too dry.

Cut mixture in a half add roll into two balls (one for crust and one for topping). Flour a sheet of parchment paper or wax paper on a flat surface. Shape balls into disc shapes and place on surface.

Cover the dough with an additional piece of wax paper Roll crust out to slightly bigger than your pie tin. Remove the top wax paper, place your hand under the bottom piece of wax paper and turn over into your pie dish.

Slowly remove the wax paper from the top of the crust. If it breaks up just mold it back together. Press edges on crust with a fork to crimp the edges. Pierce bottom slightly with a fork. Add pie mixture.

Vegan Green Bean Casserole

Have you decided what you will bring to your family and friends soiree this holiday season?

How about our Green Bean Casserole made from scratch, vegan friendly and enjoyable for all?! While this side dish isn’t the main attraction it is definitely a crowd pleaser. The perfect combination of crunchy and creamy in a vegetable dish… what more could you ask for!

vegan ambrosia salad

TOTAL: 1 hour

Serving Size:4

Ingredients

Crunchy topping

  • 3 large shallots, sliced thin
  • 3 tbsp. gluten free flour (not corn flour, we like Bob’s Red Mill brand)
  • 1 tsp. organic seas salt
  • 1 tsp. black pepper
  • 3 tbsp. organic coconut oil

Casserole

  • 1 cup raw cashews, soaked overnight in water (do this first and add to cream sauce later)
  • 1 lb. whole organic green beans, washed and trimmed
  • ½ lb. whole organic yellow beans, washed and trimmed
  • 3 tbsp. organic white mushrooms
  • 4 cloves of garlic, minced
  • 1-cup organic unsweetened almond milk

Directions

Preheat the oven to 350 degrees.

Topping

Cover the sliced shallots in flour, salt and pepper. Heat coconut oil to medium high and add the floured shallots. Fry for 3 minutes or until golden brown. Remove from stove and place on a plate lined with paper towels and place the onions on top but do not dab with paper towel.

Casserole

Drain cashews and reserve ½ cup of the water. Place cashews and water in a Vitamix or blender and blend until they are a creamy consistency, set aside.

Bring 1 cup of water to boil and blanch the green beans for 3 minutes. Remove from boiling water and place in a 1 ½ quart baking dish.

Bring the coconut oil to medium-high in a saucepan. Add mushrooms and cook for 2-3 minutes. Add garlic and continue for 1 minute. Turn off heat and add almond milk and cashew blend. Mix well and pour over the green beans in the baking dish. Bake for 15 minutes in the oven. Add Crunch topping and continue to bake 5 more minutes. Serve hot.

Coconut Whipped Cream

Use this vegan, gluten-free whipped cream on anything you want to make taste decadently delicious.

coconut whipped cream

Ingredients

  • 1 can full fat coconut milk (refrigerate overnight)
  • 2 tbsp. raw coconut sugar
  • 1 tsp. real organic vanilla extract

Directions

Remove the can of coconut milk from refrigerator very carefully. Make sure not to shake the can at all.

Open slowly and scrape out the top layer of coconut that is creamy (don’t worry if you get a little of the water just try to get only cream).

Place in a mixing bowl with coconut sugar and vanilla extract.

Beat the cream on high for 2 minutes or until it becomes a cream substance. Top on pumpkin pie or anything else your heart desires this holiday!

Warm Pumpkin Salad

This is a delicious fall treat for those first cool days that signal the end of summer. It’s very filling and makes you feel full even though it’s a salad. It’s also very healthy and vegan. – Veronica

pumpkin quinoa salad

Serving Size: 2-4 people

Ingredients

Warm Pumpkin Salad

  • 1 Tablespoon coconut oil
  • 1/4 cup diced sweet or yellow onion
  • 1 small pie pumpkin, skinned, seeded and chopped into 1/2 inch cubes
  • 1 clove garlic, minced or pressed
  • 1/2 teaspoon ground nutmeg
  • 1/2 teaspoon fresh thyme leaves
  • 1 cup cooked quinoa
  • Sea salt, to taste
  • Freshly ground black pepper
  • 4 cups wild greens (arugula, spinach, or mixed lettuces)
  • 1 cup pomegranate seeds

Directions

Warm the pumpkin: In a large non-stick pan, heat the coconut oil over medium heat. Add the diced onion and pumpkin. (The smaller the pumpkin is diced the more quickly it will cook.) Sauté the pumpkin and onions over medium heat for about 5 minutes, or until the squash is soft. Do not burn the pumpkin or onions.

Add the garlic, nutmeg and thyme, and cook for 1 to 2 minutes more. Transfer the pumpkin to a bowl and stir in the cooked quinoa. Add salt and pepper to taste. Cool mixture in the refrigerator for 15 minutes.

To serve, mix the dressing ingredients and drizzle over greens. Top with cooled pumpkin mix and garnish with pomegranate seeds. Serves 2-4.

Acai Bowl

Chef V tip: Try an acai bowl for breakfast, too!

Acai is a berry-like fruit native to the rain forests of the Amazon. It has a bitter taste and a very short shelf life, so we don’t often find them fresh in the store. Acai berries contain antioxidants, fiber, and heart-healthy fats.

acai bowl

Ingredients

  • 1 frozen unsweetened acai smoothie packet (I like Sambazon)
  • 1/2 cup frozen blueberries
  • 1/2 cup frozen raspberries or blackberries
  • 1/2 cup Chef V’s Raw Almond Milk
  • 1/2 cup fresh seasonal fruit (blueberries, raspberries, kiwi, peaches) use your favs!
  • 1 tablespoon shredded unsweetened coconut
  • 1/4 cup crushed raw almonds, optional

Directions

In a Vitamix, process frozen acai juice, blueberries, raspberries, and almond milk on medium until smooth. Transfer to a bowl and top with your favorite fresh fruit, coconut, and almonds, if desired.

How Does “V” Reboot Her Mind & Body? Cleansing Lessons From ChefV.com’s Founder

Through her email newsletters and blog posts, Chef V has helped thousands of customers by providing useful tips and tricks on how to prepare for a cleanse and what to do during before and after the cleanse to maximize success and long-term healthy habits. Now it’s time to turn the tables and find out how “V” (Veronica) cleanses…

You might assume that someone who literally wrote the book on Making Cleansing Easier frequently does a cleanse. But Veronica Kress, the “V” in Chef V, admits to only doing a full-blown cleanse about twice a year.

Why only twice a year?

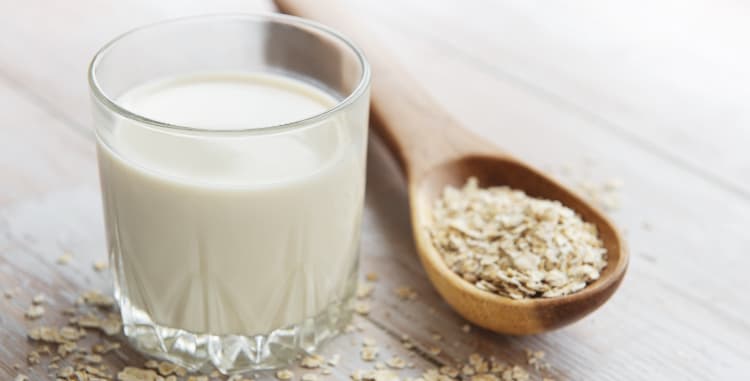
Well, when you practice what you preach and do a mini cleanse every day, you don’t need to purify yourself that often. Having an Organic Green Drink every morning on an empty stomach is a daily religious rite of passage for V. “Each one of us naturally cleanses every night while we’re sleeping,” V explains, adding, “And when I have a Green Drink for breakfast after drinking some pure water, I’m prolonging the process.

But on the rare occasions, she feels she’s in a rut and experiencing cravings for junk, it’s time for V to get her cleanse on!

How Does V Know When To Do A Cleanse? 

“I know when I need to do a full cleanse if I’m at a party and have a couple Doritos and then suddenly I’m craving the whole bag and other junk food.”

V reveals an intimate detail about why she did a cleanse in the summer of 2021. The reason why she chose to do it? In the hopes of getting pregnant. “I’ve had several customers tell me that after they did a Chef V cleanse, they became pregnant so I thought I might as well try too,” V laughs. (She is now the proud Mom of baby Kaden!)

But there was another reason that V does a full cleanse that doesn’t have anything to do with procreation. “People may think I’m this perfect saint of nutrition but I’m not. Before that last cleanse, I had family in town and we did a lot of wine tasting,” V explains.

What is V’s Motivation For Doing A Cleanse?

Most people do a cleanse with the singular goal of losing weight. V says that even though weight loss isn’t her primary goal, she will lose 3-5 pounds after doing a 3 day cleanse. But the primary reason V does a cleanse—besides purging the urge to eat junk—is to sharpen her mental clarity.

“If you’re frequently craving unhealthy foods, brain fog usually accompanies the cravings,” V says.

In addition, V is motivated to do a cleanse because she realizes the plethora of benefits that accompany it, including improved sleep quality and clearer skin.

V emphasizes the amazing power that a brief cleanse has in resetting the taste buds. If you’re frequently craving starchy carbs and chemicals even a short cleanse has the potential to restore the appreciation for the natural sweetness of fruit. “When you stop eating foods with synthetic chemicals and added sugars, berries will taste amazing and then you won’t crave the bad stuff,” she says.

V’s Favorite Cleanse

In choosing between ChefV.com’s cleanse options, V says she’s partial to the 3 day cleanse because it’s the most doable.

But a 3 day cleanse isn’t really just a 3 day cleanse, V explains. That’s because the pre-cleanse phase is crucial. V says that the number of days she does a pre-cleanse depends on how her diet has been. If she’s done more wine tasting than usual or indulged in her favorite other vice—french fries—V will pre-cleanse for at least 3 days.

V’s pre-cleanse instructions are crystal clear with the 1-day, 3-day and 5-day options. Basically, V provides a list of foods to eat and to avoid before the cleanse, which is more calorie-restricted, begins.

How V Preps For A Cleanse

There’s no point in doing a cleanse if you’re not going to pre-cleanse in order to properly prepare your body, V says. “Why spend all this time and money if you’re not going to do it right?” she asks.

And while some of the “Don’t Eat This” foods on the pre-cleanse list may seem obvious, V avoids certain seemingly healthy foods leading up to the start of the official cleanse. For example, bananas are a no-no because of the high amount of sugar. Grapefruit contains an enzyme that actually slows phase 1 detoxification in the liver.

V also avoids strawberries, even organic ones, because they may contain a high amount of pesticides. Same deal goes for grapes and then there’s tomatoes, potatoes, eggplant and peppers, all of which are in the nightshade family. V avoids nightshades leading up to the cleanse because they may promote inflammation, especially if there’s already excessive inflammation in the body.

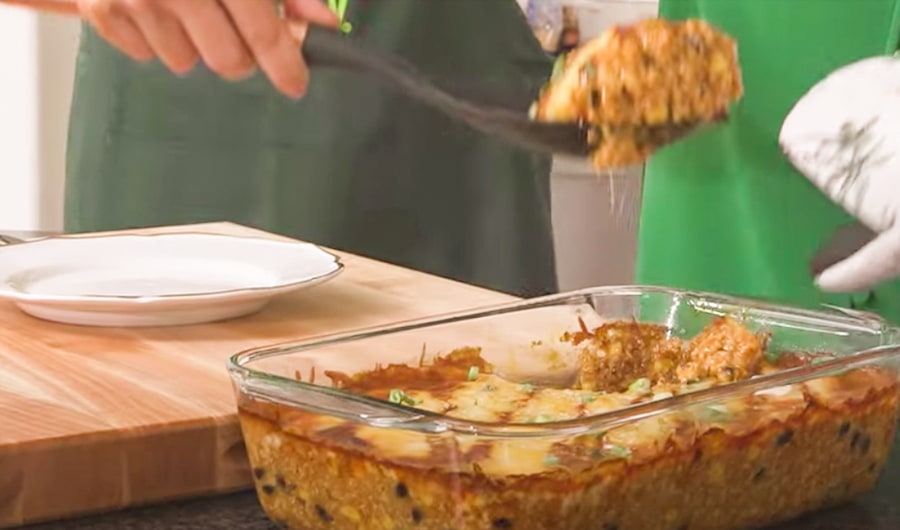
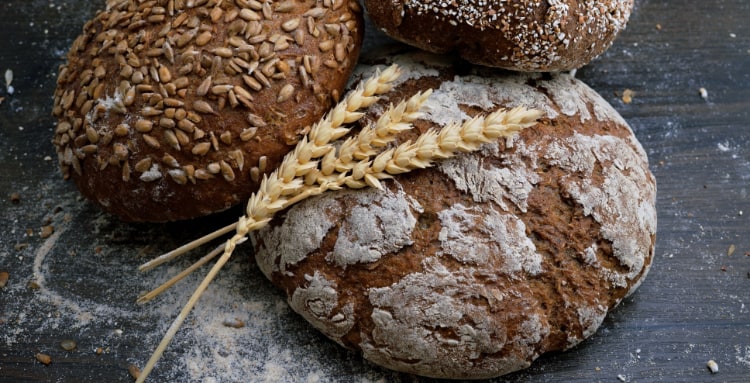
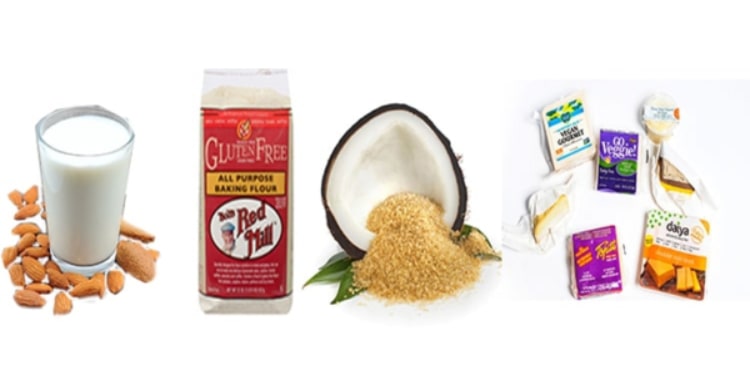
But the most important foods V avoids in the days leading up to her cleanse—and the immediate days after the cleanse is over—are anything with gluten; dairy products, red meat, caffeine and alcohol.

V says she decided to make caffeine a no-no on the pre-cleanse list because it takes a lot of energy for the body to detoxify from caffeine. But the good news is that she has helped thousands of people overcome their caffeine addiction. “They feel amazing afterwards,” she says.

below, click image to download pdf of includes and excludes

Why V Created The Pre-Cleanse Phase

So how did V come up with the idea of a pre-cleanse phase in the first place? Was it the certified nutritional therapy course she took? Nope. She was inspired to create it when a few customers walked into her former commercial kitchen in San Diego and said, “We’re going to Burger King for our last meal before the cleanse!”

V emphasizes that lots of people still don’t realize the importance of the pre-cleanse phase. If you go from filling up your car’s gas tank with sugar and then all of a sudden fill it up with the proper fuel, your car will still run like crap.

So later that night after the Burger King fiasco, V researched everything she could find about gut healing and cleansing, including what foods to eat and not to eat. The pre-cleanse instructional materials that are provided to every ChefV.com cleanse customer was soon after completed!

In addition to properly preparing your body for the cleanse, the pre-cleanse phase, V says, helps her customers typically lose 5 pounds. “The pre-cleanse phase can be just as successful as the cleanse phase.”

What V Does If She Has Cravings During A Cleanse

V doesn’t like to use the word “cheating” when it comes to experiencing cravings during a cleanse. It’s too much of a negative connotation. V likes positive reinforcements instead. Which is why V employs the concept of “intuitive eating” when her brain tells her that she’s hungry during the cleanse phase.

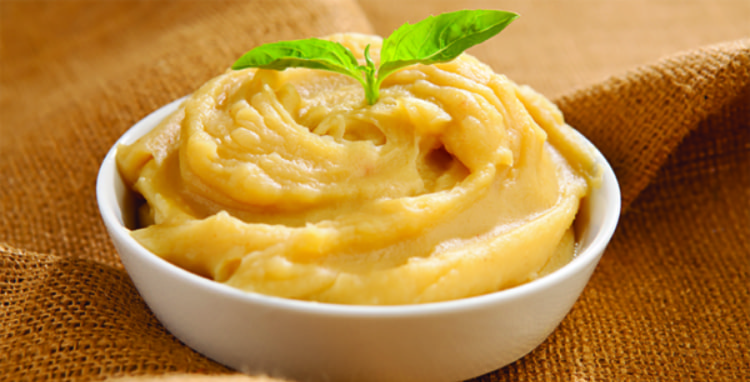
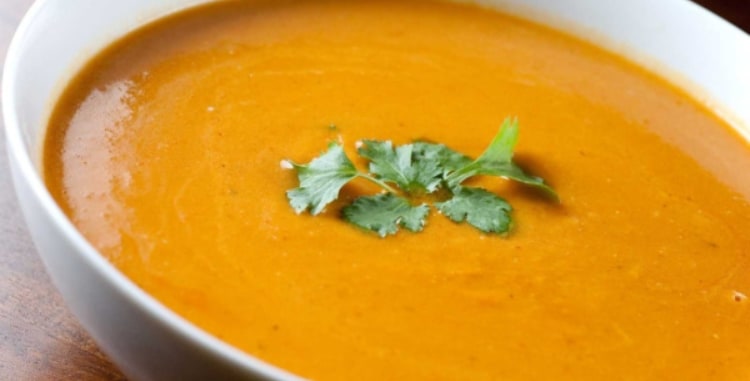
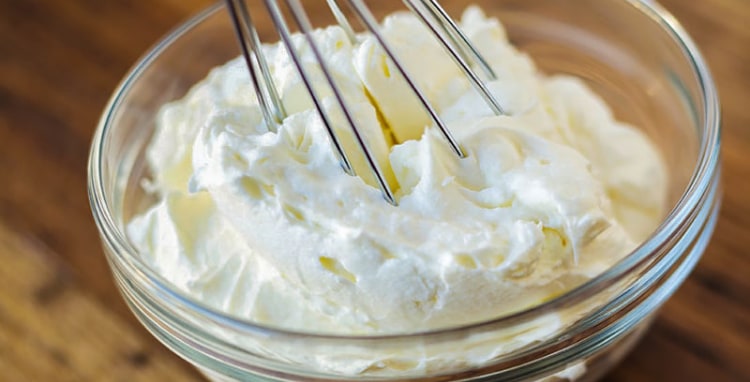
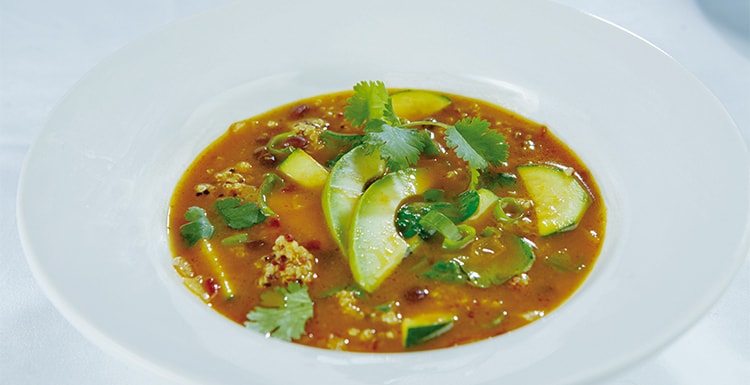
Instead of giving in to cravings for unhealthy snacks, V says that she’ll have a tiny bit of healthy fats like a teaspoon of coconut oil and a slice of avocado added to her Detox soup.

“The tiny amount of avocado felt so indulgent. I admit that I did feel like I was cheating a little bit, but I was making a wise decision by listening to my body.”

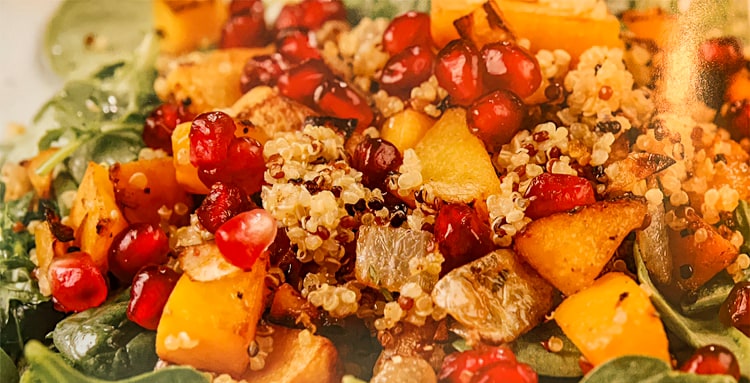
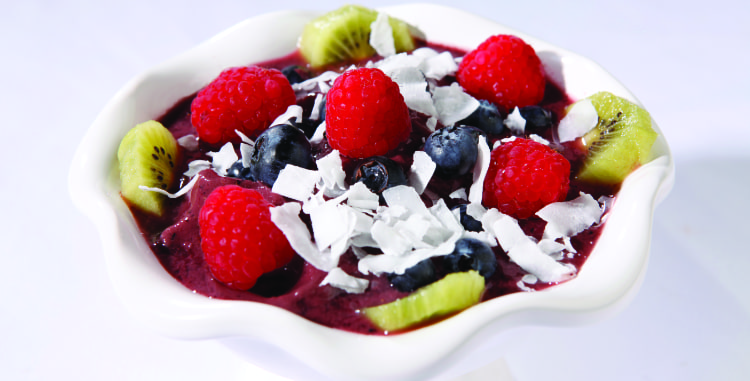
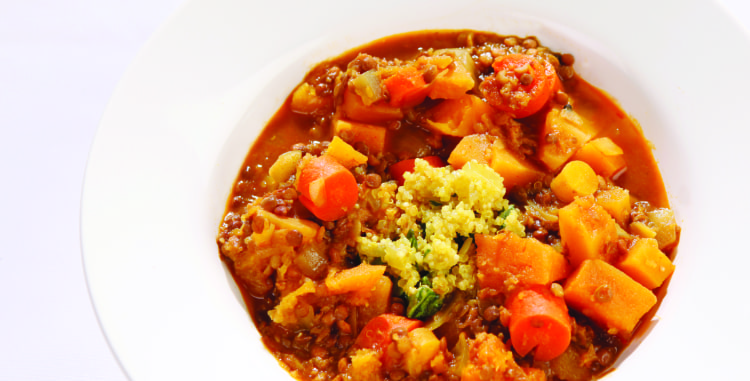
V also says that during the cleanse phase, one way to satisfy a craving without ruining the benefits is to puree or blend an extra veggie juice. Eating lots of cooked food, even healthy foods like low-starch veggies takes a lot of energy for the body to digest. For this reason, V says to eat a liquid lunch or dinner—if your body is really telling you that it’s hungry. Having a handful of nuts, berries, and a few carrot sticks and hummus won’t sabotage your success either.

“Don’t be so hard on yourself during the cleanse phase,” V says.

Veronica and Brandon in Hawaii

White Sweet Potato Purée IBS Version

You just can’t have a special meal without mashed potatoes. But regular mashed potatoes are very starchy. That means the starch quickly converts into sugar. That’s more bad news for your gut. But this healthy recipe for mashed potatoes uses the nutritiously-superior white sweet potato. Instead of regular milk, I use almond or coconut milk. This recipe is designed for people with IBS who are following a low FODMAP diet.

I swear to you that my white sweet potato pureé will have the same starchy mouth-feel as regular mashed potatoes. But this version contains way more minerals and is lower in calories. – Veronica

sweet potato puree

TOTAL: 1 hour

Serving Size:2

Ingredients

  • 1 large white sweet potato, peeled and chopped
  • 3 cups filtered water
  • 1/4 cup Chef V’s Raw Almond Milk or coconut milk
  • 1/4 teaspoon sea salt

Directions

Boil the sweet potato pieces in the 3 cups of water in a large pot for 15 minutes, or until soft. Transfer the pieces to a Vitamix and add the milk, and sea salt and process until smooth. Serve immediately or keep refrigerated for up to 1 week.

Chef V’s Cooking with V – Chicken Pot Pie

Welcome to Chef V's Cooking School!

I'm Veronica, Certified Nutritional Therapist, author, and proud owner of Chef V. You might know me for my Green Drink and Cleanses, but I started Chef V as a personal chef. In my first video cooking series, I'll be sharing some of my clients' favorite recipes with you.

Using this blog and my YouTube channel, I welcome you to my kitchen. We're going to laugh, learn and cook – together.

This month we are making Chicken Pot Pie with my trusty sous chef and husband, Brandon.

CHICKEN POT PIE

Watch Veronica make the recipe in the video above and follow along with the directions, below.

INGREDIENTS

  • 2 tbsp. olive oil (separated)
  • ½ white onion, diced
  • 1 Gluten Free pie crust
  • 1 lb. Organic Chicken, poached or use rotisserie chicken
  • ½ cup Fresh or frozen Peas
  • 1 Carrot, chopped
  • 1 Celery, chopped
  • 2-3 tbsp. Gluten Free flour (separated)
  • 2 cups Chicken or vegetable stock.
  • ½ cup dairy free milk
  • 1 egg white to brush the top of pie crust.
  • 1 tsp. salt
  • dash of pepper

DIRECTIONS

shredding the chicken

PREPARE THE CHICKEN

You can poach the chicken or I like to use a rotisserie chicken, it’s easier and has more moisture. I like to shred the chicken instead of chop it.

chopping veg

cooking veg

PREPARE THE VEGGIES

Chop the carrot, onion, and celery.

Sauté the vegetables in a pan – heat 1 tbsp. olive oil and add onion, add carrot, then celery to the pan. Add salt and pepper. Sauté lightly for 2 minutes.

making the roux

MAKE THE ROUX (SAUCE) 

In another pan create the roux. Add 1 tbsp. olive oil and add 1 tbsp. gluten free flour and stir until golden brown (about 2 minutes). Slowly add chicken or vegetable stock ½ cup at a time and stir until you have like a gravy. Add salt to taste. Reduce the heat to low, add the dairy-free milk, and continue to stir.

boil water

PREPARE THE PIE

Add the gravy, the chicken, and cooked vegetables to a pie pan.

roll out dough

MAKE THE PIE CRUST

This recipe uses a purchased gluten-free dough. Or you can use my recipe for gluten-free pie crust. 

Roll out the gluten-free dough. Place 1 tbsp gluten-free flour on a surface and roll the dough into a circular shape, slightly larger than the pie pan, with a rolling pin.

adding egg white to pie crust

ASSEMBLE THE PIE

Place the crust over the pie pan and press the edges with a fork. Add some slits at the top for air and decor. Mix one egg white and brush the top of the pie.

making the sauce

BAKE AND SERVE

Bake in the oven uncovered for 30-45 minutes until the crust is a nice golden brown. Serve hot.

TASTING THE PIE

NOW THE BEST PART – THE TASTE TEST!

Brandon says “winner winner, chicken dinner.”


Chef V’s Cooking with V – Quinoa Enchilada

Watch the enchilada video & read the recipe

Welcome to Chef V's Cooking School!

I'm Veronica, Certified Nutritional Therapist, author, and proud owner of Chef V. You might know me for my Green Drink and Cleanses, but I started Chef V as a personal chef. I'll be sharing some of my clients' favorite recipes with you.

This is my first ever cooking series and I welcome you to my kitchen. And of course I couldn't do my show without my trusty sidekick Brandon – Sous-Chef B. And our dog Coconut – Taste Tester. We're going to laugh, learn and cook – together.

We are starting with my famous Quinoa Enchilada – or “the whole enchilada” as my husband says. That's so cheesy – no pun intended. This recipe is Challenge approved for the purpose of cleansing as long as you substitute vegan cheese and omit the corn.

quinoa enchilada ingredients

INGREDIENTS

  • 1 cup quinoa
  • 2 jars enchilada sauce
  • 1 cup cooked black beans
  • 1 cup frozen organic corn
  • 3 cups organic cheese or vegan cheese
  • 1 tbsp. chopped green onions for garnish
  • 1lb. ground turkey or you can substitute chopped mushrooms
  • 1 tsp. taco seasoning (optional)

quinoa enchilada ingredients

MY SECRET INGREDIENT

Trade Joe's Enchilada Sauce is my secret ingredient – you can use a different sauce but we think this one makes the difference.

quinoa enchilada ingredients

COOK QUINOA & TURKEY

Quinoa: Cook quinoa as directed on package or use these directions:

Cook quinoa on stovetop: 1 part quinoa and 2 parts water. Bring to a boil, then simmer covered for 10-15 minutes or until done.

Turkey: sauté ground turkey or chopped mushrooms with taco seasoning.

mixing enchilada ingedients

MIX INGREDIENTS IN A BOWL

Add cooked quinoa, turkey (or sub), ¾ of the cheese, beans, corn, and 1 ½ bottles of enchilada sauce to the bowl and mix.

casserole assembly

ASSEMBLE CASSEROLE

Add contents of the bowl to the casserole dish.

Add the rest of cheese on top and drizzle a little sauce on top.

Top the casserole with the chopped green onions – you can add them before or after baking.

baked casserole

BAKE

Cook covered 20 minutes and uncovered 15 minutes at 350.

eating the casserole

ENJOY!

Customers who've tried this recipe say it is even better the second day. You can keep it in the refrigerator for several days, if it lasts that long! Brandon says this recipe taste as good or better than “real” enchiladas.

Cheers to your health – Veronica

Awesome Mac & ‘Cheese’ IBS Version

Chef V’s tip: This is my gluten-free, dairy-free version of macaroni and cheese with variations for those following a FODMAP IBS diet. – Veronica

super smoothie

Ingredients

  • 3 cups filtered water
  • 2 cups peeled and chopped butternut squash
  • 1/2 cup Chef V’s Raw Nut Milk
  • 1 tsp nutritional yeast
  • 2 cups raw cashews, soaked and drained
  • 1/2 lemon, juiced
  • 1/4 teaspoon sea salt
  • 2 cups cooked brown rice elbow pasta
  • Freshly ground pepper, optional

Directions

Bring the 3 cups of water to a boil in a saucepan and cook the butternut squash for 20 to 30 minutes, or until soft.

Process the cooked squash, nut milk, garlic (sub garlic for nutritional yeast for IBS version), cashews, lemon juice, and salt in a Vitamix until smooth.

Combine the ‘cheese’ sauce and cooked pasta, season with black pepper if desired, and serve.

Awesome Mac & ‘Cheese’

Chef V’s tip: This is my gluten-free, dairy-free version of macaroni and cheese.

super smoothie

Ingredients

  • 3 cups filtered water
  • 2 cups peeled and chopped butternut squash
  • 1/2 cup Chef V’s Raw Nut Milk
  • 1 clove garlic, minced or pressed
  • 2 cups raw cashews, soaked and drained
  • 1/2 lemon, juiced
  • 1/4 teaspoon sea salt
  • 2 cups cooked brown rice elbow pasta
  • Freshly ground pepper, optional

Directions

Bring the 3 cups of water to a boil in a saucepan and cook the butternut squash for 20 to 30 minutes, or until soft.

Process the cooked squash, nut milk, garlic (sub garlic for nutritional yeast for IBS version), cashews, lemon juice, and salt in a Vitamix until smooth.

Combine the ‘cheese’ sauce and cooked pasta, season with black pepper if desired, and serve.

Gluten-Free Toast + Avocado Smear

A special breakfast or a brunch treat, my recipe adds flavor to the avocado with a hint of vinegar’s tang and red pepper flakes.

avocado toast

Ingredients

1 slice gluten-free bread or 1/2 gluten free bagel

OPTIONAL TOPPINGS

  • Fresh lemon juice
  • Apple cider vinegar
  • Pinch cayenne pepper or red pepper flakes
  • Pinch sea salt

Directions

Lightly toast the bread and spread the avocado on like butter. For extra pizzazz, add a dash of lemon juice, apple cider vinegar, cayenne pepper, or sea salt, if desired.

Not Ready To Go Gluten-Free? Eat These 5 Healthy Grains You’ve Never Heard Of…

gluten free grains

Should You Be Gluten Free?

“Hey Chef V, should I go gluten free?” 

It’s a question I get asked almost every day. 

So here’s my take on gluten…

I recommend people go gluten-free during the pre-cleanse phase of Chef V Cleanse (3, 5 & 7 days) and 21 Day Detox

That’s because most people aren’t eating the 5 healthy grains I’ll introduce in just a bit. Most people eat heavily-processed wheat products. Which can ruin your health in a few ways.

Most packaged foods contain wheat or wheat flour and are not organic. The wheat flour in processed food is heavily sprayed with pesticides like glyphosate. That’s bad news because glyphosate may be linked to several health problems including poor gut health (this study shows).

So it might not be the gluten you’re having a reaction to in wheat products. It could be the chemicals!

The wheat that’s in products sold in almost every supermarket aisle contains gluten that has been dramatically altered. 

ancient grains

Today’s gluten protein molecules in packaged foods are larger than the 5 healthy grains below. And that means your body might not recognize the modern wheat protein like it does ancient wheat. As a result, your body could start attacking the genetically-engineered wheat proteins. This in turn can lead to autoimmune reactions. 

The good news is that you don’t have to completely give up gluten. (Unless you have Celiac Disease.) There are several healthy grains with old-school gluten that may not cause gluten sensitivity after you eat them. 

(No, quinoa is not on this list because most people have heard of it by now.)

Jobs Tears

Healthy Grain #1: Job’s Tears 

I’ll explain the weird name in a bit. Job’s Tears taste like rice, corn and barley had a thrupple. The chewy grain has a texture like chickpeas and is about the same size as one. 

Also called coix seed, Chinese pearl barley, and Hato Mugi in Japanese, Job’s Tears are perfect for buddha bowls (huge healthy, hearty vegetarian salad). 

Ok, so now the trivia. So Job’s Tears are after the Biblical character whose faith was constantly tested by God. Personally, I’d have an anxiety attack if I went through all the stuff Job did. 

Anyway, legend has it that when Job cried because of his many sorrows, the tears produced this healthy grain that looks like gray teardrops. 

Fonio grain

Healthy Grain #2: Fonio

You can think of fonio as couscous’s cousin. A tiny grain originally from Africa, fonio doesn’t look all that appealing raw. In fact, it looks like grains of sand. But if you have a delicious sugar-free sauce, fonio will wonderfully absorb the flavors. 

You probably won’t be able to find fonio in most supermarkets. Not even Whole Foods. But like just about anything else, you can find it online. 

Super high in B-vitamins (with the exception of B12, which is only obtained from animal sources), fonio might be a grain you’ll be hearing more about in the future. 

Will it be as popular as quinoa one day? Probably not. But time will only tell. 

Healthy Grain #3: Einkorn

If you love the taste of commercial wheat just like it’s found in the supermarket, einkorn is for you. Only, einkorn is healthier than typical supermarket wheat-based products. 

That’s because it’s nature’s original wheat and it’s never been genetically messed with in the 12,000 years it’s been cultivated. 

I’ll get to the reason why it hasn’t been altered. But first, let’s review einkorn’s taste profile. Like most ancient grains, it’s got a nuttier flavor than commercial, modern wheat. People who love to bake but want to use healthier ingredients love einkorn as a substitute for commercial wheat. 

Next time you try baking banana bread or making pancakes, make them with einkorn flour instead of whole wheat flour. 

The superfood of the Egyptian pharaohs, einkorn was largely forgotten about for centuries. Early farmers discovered other grains that were easier to harvest. As gluten sensitivity has become more widespread, people have taken an interest in this long-forgotten unhybridized good gluten. 

Healthy Grain #4: Freekeh 

Get your freekeh on! Haha. What the frick is freekeh you may ask? It’s known as the King of Grains in the Middle East, the first breadbasket of civilization. 

Raw freekeh wheat does look freakish. It’s green. But after it’s cooked it emerges with a light smoky profile. I’ve heard it described as having a taste similar to fire-roasted cashews. 

As is the case with all 5 ancient grains, don’t eat them plain. Drizzle some olive oil or avocado oil on them. I also like Bragg’s liquid amino acids and a dash of Himalayan sea salt. 

Healthy Grain #5: Teff

OK, so what the “F” is teff? It’s actually the one healthy grain on this list that doesn’t have gluten. That’s right, teff is gluten free. That means that people with Celiac Disease or gluten sensitivity can party with teff.

Naturally rich in calcium and vitamin C, teff are tiny grains that act like a resistant starch. Resistant starches resist digestion in the small intestine. Instead, they ferment in the large intestine (colon). 

That may sound gross. But it’s actually super healthy. Your good bacteria digests these fermented teff sugars and creates short-chain fatty acids. Short chain fatty acids provide us with so many health benefits. But that’s the subject of another Chef V article. 

For now, try a couple of these ancient grains and tell us what you think on Chef V Life. 

Do You Have To Be Gluten-Free To Be Healthy?

sourdough bread

“Let’s talk about bread, baby, let’s talk about all the good things and the bad things that may be…”

With apologies to Salt ‘N’ Pepa (I’m starting to show my age!), bread isn’t as sexy as a topic as, well, sex. But actually in a way it is, because the conventional logic in natural health circles is that if you want to be slimmer and feel sexier, you’ve got to abstain from bread. 

Personally, I don’t have bread every day or even close to every day. On the rare occasion I do eat bread, I’ll choose a gluten-free variety or organic sourdough cracked bread from Trader Joe’s. 

And what about you? How often do you eat bread and other foods that contain gluten? If you’re eating gluten everyday, is this a ticking time bomb? Are you setting yourself up for an autoimmune disease or other serious health condition later on in life if you continue on your gluttonous gluten-filled path? 

Here’s what I think about whether or not it’s necessary to go gluten-free…

ancient breads

Today’s Gluten: A Different Breed 

When wild wheat was first collected some 20,000 years ago, it was much different than the wheat that’s harvested today. Through selective hybridization, wheat has been modified thousands of times. 

Wheat, which contains gluten, the glue-like protein structures, is one of the most complicated species in terms of gene variation. You and I have about 25,000 genes that contribute to our individual traits. Wheat can contain as many as … get this … over 330,000 genes!!!

That’s right, wheat is more genetically complex than human DNA. But it wasn’t always like that. During the last 50-60 years or so, as the industrialization of food became the norm, wheat has become so bastardized that it would hardly be recognizable to the first agrarians who started cultivating it. 

And as wheat has changed, so has gluten. The gluten molecules over the years have become larger. And modern wheat products contain more gluten than their ancient counterparts—gluten has become bigger and badder!

What does this mean for your health? If you’re eating lots of processed wheat and other foods that contain gluten, your blood sugar levels are going to suffer. That’s because modern wheat elevates blood sugar levels higher than ancient wheat varieties. 

In fact, Dr. William Davis, author of the best-selling book from a decade ago, Wheat Belly, compared his blood sugar levels after consuming processed wheat bread compared to an ancient variety of wheat. With his baseline, fasting blood sugar at 84, Davis’ blood sugar spiked to 167 mg/dl after eating modern wheat bread. But after eating a variety of ancient wheat, his blood sugar rose to a far more moderate 110 mg/dl. 

So you see, like most things in life, not everything is black and white. The devil is often in the details as they say. 

The same is true with gluten. Gluten has a bad reputation, and for good reason; 99% of supermarket products contain highly-hybridized wheat gluten. 

And with bigger gluten molecules and more of them, it’s no wonder that many people have bad reactions after eating gluten. 

But not all gluten is bad…

Organic Sourdough Bread: Good Gluten?

Sourdough bread contains gluten. But there’s less gluten in sourdough than in wheat bread. Another benefit of sourdough is that it acts like a prebiotic fiber. Prebiotic fiber is what the good bacteria in your gut feed on in order to survive and thrive. 

When I do eat sourdough bread, I always opt for organic. That’s because organic foods in general have less glyphosate. That’s the potentially-cancer causing herbicide and pesticide in Roundup weed killer that was developed by Monsanto, and the focus of over 125,000 lawsuits and counting.

Organic sourdough bread is fermented and contains more antioxidants than other varieties of bread. Plus, it’s easier on your belly to digest than wheat bread. 

ancient grains

Gluten: The Older The Better

Besides sourdough bread, what other foods with gluten may actually be good for you? Try eating ancient varieties of wheat that have not been hybridized to the extent that modern wheat has, and that won’t spike your blood sugar as high.

Einkorn and emmer wheat are a couple examples. There’s also spelt, kamut, farro and teff. 

Considering how used to modern wheat your taste buds are, it may take some getting used to ancient heirloom wheat varieties. 

But if you don’t want to give up gluten and want to take charge of your blood sugar levels and your overall health, give ancient wheat a try. Unless you have a true allergy to gluten such as Celiac Disease, you’ll probably find ancient wheat is easy to digest and won’t cause wheat belly. 

Chef V and kale

Chef V’s Cranberry Sauce

So how do I make cranberry sauce healthy?  To sweeten the organic cranberries, I use coconut sugar. Coconut sugar is much better for your health because it doesn’t spike your blood sugar levels.

Take a look. Doesn’t it look just like the real thing? And in my opinion, my cranberry sauce tastes better than traditional Thanksgiving.

– Veronica

pumpkin pie

Ingredients

  • 1½ cups fresh or frozen organic cranberries
  • ½ cup raw coconut sugar
  • 1 tsp. organic lemon zest
  • 2 tbsp. filtered water
  • 1 tsp. organic sea salt

Directions

Add one cup of cranberries to a medium sized saucepan. Reserve ½ cup for later. Add the coconut sugar, water and lemon zest to the pan and cook over low heat for 10 minutes, stirring occasionally.

Increase the heat to medium-high and cook until the cranberries burst, about 10 more minutes. Reduce the heat and stir in the remaining cranberries for texture. Stir occasionally for 10 minutes. Remove from heat and add sea salt. Refrigerate for 3 hours or overnight.

Bon Appétit!

Chef V’s Easy Homemade Gluten-Free Oat Milk

nut milks

If you are allergic to nuts, my gluten-free oat milk recipe is a delicious alternative to my homemade nut milk.

Making your own oat milk is SO easy! All you need is a blender (I prefer Vitamix), cheesecloth or a nut milk bag, organic gluten-free oats and filtered water.

Cheese cloth is great because you get so much in one package, it’s so versatile, and you can use it on a million things (making nut cheese, poaching fish, nut milks, straining seeds from fruit, and lots more.) However, I bought a nut milk bag and it is so much faster and easier to use the nut milk bag.

I use oat milk in so many things. I cook with it any time a recipe calls for milk and no one can ever tell the difference. I also use it in my smoothies to make them creamy. You can add it to coffee or tea, cereal, or just have a refreshing glass with ice.

The milk will stay fresh about 3-5 days in the refrigerator. I keep them in mason jars, since each jar is about 2 cups and this recipe makes 4 cups. I use two jars so the milk stays fresher for use later in the week.

Once you try homemade oat milk it will be almost impossible to drink store-bought milk again, which is pumped with artificial crap to keep it fresh on the shelves.

The sad part is that a typical consumer would have no idea about what is inside of store bought oat milk or that it’s actually bad for you. The toxic ingredients found in commercial oat milks stress your immune system and weaken your health. The ingredients are also misleading and include words such as Vitamin A Palmitate, which can cause birth defects and bone fractures. Vitamin D2, which if taken in excess, can cause headaches, nausea, vomiting, abdominal cramps, muscle weakness and bone pain. But the worst thing about store-purchased oat milk is it usually doesn't even contain much oat!

In light of this, I suggest making your own nutritious and delicious oat milk. And the great part is, it’s really easy!

INGREDIENTS

  • 1 cup gluten-free oats
  • 2 cups water, for soaking
  • 4 cups cold filtered water, for blending
  • High power blender (I prefer Vitamix)
  • Nut Milk Bag or Cheesecloth

INSTRUCTIONS

Soak the oats in 2 cups of water for 30 minutes. Drain the oats. Add oats and 4 cups of cold water to blender and blend on high for 2 minutes. Pour the oat mixture into the cheesecloth or nut milk bag. Squeeze out excess milk. Pour into mason jars or a milk jug.

Use Chef V’s Oat Milk right away or it keeps for 3-5 days refrigerated. Shake before use.

You can add some oat milk to your Green Drink to make it a little creamy. Yum!

Fall Pumpkin + Carrot Stew with Quinoa

My Fall Pumpkin Stew is made with mellow spices for a flavorful and healthy meal.

This stew can be prepared a day ahead. It’s great to take to work or enjoy for dinner the next day, or for a warm and healthy meal for the kids to come home to and easily reheat.

mediterranean stew

Ingredients

  • 2 tablespoons cold-pressed olive oil
  • 1 cup white onion, diced
  • 3 cloves garlic, minced or pressed
  • 2 teaspoons sweet paprika
  • 1 teaspoon sea salt
  • 1/2 teaspoon each: black pepper, ground coriander, ground cumin, ground turmeric, ground ginger, cayenne pepper
  • Pinch saffron
  • 1 cup filtered water
  • 1 cup cooked lentils (if canned, do not drain: if cooked, save 1/4 cup of the cooking water)
  • 2 tablespoons fresh lemon juice
  • 3 cups (about 1& 1/2 pounds) cubed pumpkin
  • 2 cups peeled carrots, cut into 3/4 inch slices

QUINOA

  • 1 tablespoon cold-pressed olive oil
  • 1/2 cup diced white onion
  • 2 garlic cloves, minced
  • 1/2 teaspoon sea salt
  • 1/2 teaspoon ground turmeric
  • 1 cup uncooked quinoa, rinsed and drained
  • 2 cups filtered water

OPTIONAL TOPPINGS

  • 1/2 cup chopped fresh cilantro
  • 1/4 cup chopped fresh basil

Directions

First, prepare the stew. Heat the oil in a large saucepan over medium heat. Add the onion and sauté until soft, stirring often, for about 15 minutes. Add the garlic and stir for 1 minute. Add the dry spices. Add 1 cup water, lentils (with liquid from the can or reserved 1/4 cup cooking water), and lemon juice. Bring the mixture to a boil. Add the pumpkin and carrots. Cover and simmer over medium-low heat. Stir occasionally and cook for about 20 minutes, or until the vegetables are tender. Keep warm until the quinoa is finished, or cover the stew and refrigerate until ready to serve.

Next, prepare the quinoa. Place the oil in a large saucepan over medium heat. Add the onion and cook, covered, until translucent, about 3 to 5 minutes, stirring often so the onion does not burn. Add the garlic, salt, and turmeric, and sauté for one minute. Add the quinoa and stir for one minute. Add 2 cups of water. Bring to a boil and then reduce the heat to medium-low. Cover and simmer until all the liquid is absorbed and the quinoa is tender, for about 15 minutes.

To serve, stir half the cilantro and half of the basil into the warm stew. Spoon the quinoa onto a platter or divide among bowls and form a well in the center. Spoon the stew into the well and garnish with the remaining cilantro and basil, if desired.

Pumpkin Lasagna & Rosemary “Ricotta”

Pumpkin Rosemary Ricotta

PREP TIME:
TOTAL: 1HR

Serving Size: 2-4 People

INGREDIENTS

Ricotta Rosemary

    • 1-cup macadamia nuts- soaked for an hour
    • ½ lemon juiced
    • 1 tsp. organic sea salt
    • 1 tbsp. fresh chopped rosemary
    • 2 tbsp. pure organic pumpkin puree
    • 1 tbsp. cold pressed olive oil

Pumpkin Sauce

  • 1 tbsp. organic cold pressed olive oil
  • 1 white onion, diced
  • 1-cup shredded organic carrot
  • 2 garlic clove, minced
  • 1 tbsp. organic rosemary, chopped
  • ¼- cup organic parsley, chopped
  • ½-cup organic basil, slivered
  • 2 cups pure organic pumpkin puree
  • 1-cup filtered water
    ¼ cup organic unsweetened almond milk
    1 tsp. organic sea salt
    ½ tsp. black pepper

Noodles

  • 1 box of gluten-free (brown rice or quinoa) lasagna noodles (about 6 whole lasagna noodles needed)

INSTRUCTIONS

Blend “ricotta” ingredients together in a Vitamix or food processor, slowly pouring the oil while blending. Blend until smooth like a ricotta texture. Scrape mixture out with a spoon into a bowl. Refrigerate while making the sauce.

Turn oven on to 350 F. Bring a large pot of water to boil (large enough that the lasagna noodles will fit in without bending). Heat oil in a medium saucepan over medium-high heat. Add onion and sauté for 2 minutes. Add carrot and sauté an additional 2 minutes. Add garlic, rosemary, basil, and parsley. Add Pumpkin puree, water, almond milk, salt and pepper. Bring to a simmer for 10 minutes.

While simmering, cook lasagna noodles for 5-10 minutes (According to box directions).

When done, line a 8” x 4” baking dish with ¼ cup of sauce on the bottom, 2 layers of noodles, ¼ cup sauce, ¼ cup ricotta, 2 noodles, ¼ cup sauce, the rest of ricotta, 2 more noodles on top, cover with sauce and bake, uncovered, for 20 minutes or until hot.

Pumpkin Lasagna & Rosemary “Ricotta”  Bon Appétit!

Mediterranean Butternut Squash + Carrot Stew with Quinoa

My Mediterranean stew is made with mellow spices for a flavorful and healthy meal.

This stew can be prepared a day ahead. It's great to take to work or enjoy for dinner the next day, or for a warm and healthy meal for the kids to come home to and easily reheat.

mediterranean stew

Ingredients

  • 2 tablespoons cold-pressed olive oil
  • 1 cup white onion, diced
  • 3 cloves garlic, minced or pressed
  • 2 teaspoons sweet paprika
  • 1 teaspoon sea salt
  • 1/2 teaspoon each: black pepper, ground coriander, ground cumin, ground turmeric, ground ginger, cayenne pepper
  • Pinch saffron
  • 1 cup filtered water
  • 1 cup cooked lentils (if canned, do not drain: if cooked, save 1/4 cup of the cooking water)
  • 2 tablespoons fresh lemon juice
  • 3 cups (about 1& 1/2 pounds) cubed butternut squash
  • 2 cups peeled carrots, cut into 3/4 inch slices

QUINOA

  • 1 tablespoon cold-pressed olive oil
  • 1/2 cup diced white onion
  • 2 garlic cloves, minced
  • 1/2 teaspoon sea salt
  • 1/2 teaspoon ground turmeric
  • 1 cup uncooked quinoa, rinsed and drained
  • 2 cups filtered water

OPTIONAL TOPPINGS

  • 1/2 cup chopped fresh cilantro
  • 1/4 cup chopped fresh basil

Directions

First, prepare the stew. Heat the oil in a large saucepan over medium heat. Add the onion and sauté until soft, stirring often, for about 15 minutes. Add the garlic and stir for 1 minute. Add the dry spices. Add 1 cup water, lentils (with liquid from the can or reserved 1/4 cup cooking water), and lemon juice. Bring the mixture to a boil. Add the squash and carrots. Cover and simmer over medium-low heat. Stir occasionally and cook for about 20 minutes, or until the vegetables are tender. Keep warm until the quinoa is finished, or cover the stew and refrigerate until ready to serve.

Next, prepare the quinoa. Place the oil in a large saucepan over medium heat. Add the onion and cook, covered, until translucent, about 3 to 5 minutes, stirring often so the onion does not burn. Add the garlic, salt, and turmeric, and sauté for one minute. Add the quinoa and stir for one minute. Add 2 cups of water. Bring to a boil and then reduce the heat to medium-low. Cover and simmer until all the liquid is absorbed and the quinoa is tender, for about 15 minutes.

To serve, stir half the cilantro and half of the basil into the warm stew. Spoon the quinoa onto a platter or divide among bowls and form a well in the center. Spoon the stew into the well and garnish with the remaining cilantro and basil, if desired.

Poached Pear with Gluten-Free Crumble & Vegan Ice Cream

Although alcohol is not recommended for cleansing, this recipe cooks out any of the alcohol and makes this a decadent dessert. You can always omit the champagne and use any liquid, even water, for this recipe.

poached pear

TOTAL 80 minutes

Serving Size: 6 people

Ingredients

  • 1 cup champagne or other liquid
  • 3 pears (d Anjou, Bartlett, Asian) halved and scooped with melon ball 
  • 1 tbsp honey 
  • 1/2 cup gluten-free flour 
  • 3/4 cup gluten-free oats 
  • 1/4 cup coconut sugar 
  • Pinch sea salt 
  • 2 tsp vanilla 
  • 3 tbsp vegan butter 
  • Vegan ice cream to serve 

poached pears in oven

Directions

Preheat oven 375 F. Mix honey and champagne together.

In a shallow baking pan lined with foil, lay the scooped pears on the pan, skin side down. Pour champagne mix to cover. Cover with foil and bake 10 minutes. Add another 10 minutes if pears are not ripe.

While pears bake, mix flour, oats, sugar, salt, butter and vanilla.

Remove pears and foil. Top evenly with crumble. Continue to bake, uncovered, for 20 minutes or until the crumble is golden brown. Remove pears.

Serve on a plate with scooped vegan ice cream. Enjoy this delicious and healthy dessert! 

Spicy Veggie Soup

INGREDIENTS

  • 1/2 tablespoon coconut oil
  • 3 cloves garlic, minced or pressed
  • 2 cups sweet onion, diced
  • 1 jalapeno, seeded (if preferred) and chopped
  • 1 to 2 (2 1/2 to 3 cups) large zucchini, diced into 1/2 inch pieces
  • 1 1/2 teaspoons ground cumin
  • 1 teaspoon chili powder
  • 1/2 teaspoon ground coriander
  • 6 cups vegetable broth
  • 1 cup cooked quinoa
  • 1 1/2 cups cooked or 1 (15 ounce) can black beans, drained and rinsed
  • 1/4 teaspoon cayenne pepper or red pepper flakes
  • 1 cup spinach or kale leaves
  • Sea salt and freshly ground black pepper

OPTIONAL TOPPINGS

  • Avocado
  • cilantro
  • green onion

INSTRUCTIONS

Heat the oil in a stockpot over medium heat. Add the garlic and onion, and sauté for 5 to 7 minutes. Add the jalapeno and zucchini, and sauté for 5 to 7 minutes more.

Bring to a boil. Reduce heat to medium and simmer for about 15 minutes, uncovered. Just before serving, stir in the cooked quinoa, black beans, cayenne, and greens. Season with salt and pepper to taste.

Garnish with avocado, cilantro, and green onion.

Black Bean Soup

Black Bean Soup, warm and comforting, is a creamy main course for a crisp fall evening. You can easily double or triple this recipe and have delicious leftovers on hand for easy meal planning. Always try to use dried or canned organic black beans and organic vegetable stock, preferably homemade. – Veronica

Black Bean Soup

Ingredients

Black Bean Soup

  • 1/4 cup white onion, diced
  • 1 tablespoon coconut oil
  • 3 cloves garlic, minced or pressed
  • 1 teaspoon ground cumin
  • 1/4 teaspoon cayenne pepper
  • 1 teaspoon sea salt
  • 4 cups vegetable broth
  • 4 cups cooked black beans

OPTIONAL TOPPINGS

  • 1/4 cup Daiya cheddar shreds
  • 1/4 cup fresh cilantro

Directions

In a large stockpot over medium high heat, saute the onion in coconut oil for 2 minutes.

Add the garlic and continue to cook for 1 to 2 minutes.

Stir in the cumin, cayenne pepper, and sea salt.

Add the broth and black beans.

Cook, stirring occasionally, for 10 minutes. Transfer to a Vitamix in batches, if necessary, and process to desired consistency. I like it chunkier or puree until smooth.

Top with cheddar shreds and cilantro, if desired.

Vegan Tiramisu – Guilt Free Decadence

While we typically recommend steering clear of sugary treats, this healthy take on tiramisu is a must!

Take a look at the ingredients listed below before you start the process – some might be new to you but don’t let that stop, we’ve included links to some of our favorite products to help guide you at the grocery store.

Plus, once you start baking and cooking with these healthy ingredients, there’s a good chance you’ll want to continue! For instance, using coconut sugar is better for you then real cane sugar as it’s low in fructose and higher in antioxidants than cane or brown sugar. And it tastes great too!

vegan tiramisu

vegan tiramisu

TOTAL: 1 hour

Serving Size:2

Ingredients

Lady Fingers
2 ½ cups all purpose gluten-free flour (we like Bob’s Red Mill)
1 cup coconut sugar
3 tsp. baking powder
2 tsp. vanilla
1/3 cup coconut oil
1 cup filtered water
Cooking spray (we like Trader Joe’s Coconut Oil Spray)
Square baking sheet

‘Mascarpone’ Filling
2 cups raw cashews, soaked for 2 hours, drained
1 can coconut cream (we use one from Trader Joe’s)
1 ½ tsp. organic vanilla or vanilla bean
2 tbsp. coconut nectar
1 tbsp. cold water (add more as needed)

Assembly Needs:
6 small glasses ( martini or wine glasses or 4 mason jars)
1 cup coffee (use decaf if you are cleansing)
6 tsp cacao powder (use 1 tsp. per glass)
Cacao nibs (optional) topping

Directions

Preheat oven to 350 degrees.

Mix dry ‘lady finger’ ingredients together.

Add oil, vanilla and water. Stir until lumps are gone. Pour the mix in a large oiled square pan.

Cook for 12 minutes or until the cookie mixture is lightly golden. Let the cooked mixture cool then cut into lady finger shaped rectangles (approximately 1” x 3”).

While the cookies are cooling, make the ‘mascarpone’ filling.

Blend the cashews, vanilla, coconut nectar and water together in Vitamix (or blender) on high until it becomes a creamy consistency. Add the coconut cream and cashews to a large bowl. Whisk together until the mixture is smooth and creamy.

Once the cookies are completely cool, pour the coffee into a shallow glass. Dip each lady finger cookie into the coffee. Start to layer the bottom of your dish with cookies, then cream and repeat. The top layer should be all cream with a layer of cacao powder. Add the cacao nibs for extra deliciousness if you’d like.

Gluten-Free Gingerbread Cookies

It’s not Christmas until the smell of gingerbread is wafting through your kitchen. Thankfully we got you covered with our very own homemade recipe created with your health in mind.

Ingredients that will leave your taste buds satisfied instead of full with regret, these are also a great gift for neighbors, teachers and party hosts. A little secret…It’s just as much fun making them as it is eating them.

But don’t take our word for it, get festive with your favorite cookie cutters and designs with our coconut whipped cream as frosting. Enjoy!

gingerbread cookies

Ingredients

  • 1 tbsp. flaxseed meal
  • 3 tbsp. filtered water
  • ½ cup coconut sugar
  • ¼ cup raw, unsweetened almond butter
  • 3 tbsp. raw coconut nectar
  • ¼ cup vegan butter or coconut oil
  • 1 tsp. ginger
  • 1 tsp. cinnamon
  • ¼ tsp. nutmeg
  • ¼ tsp. sea salt
  • ½ tsp. baking soda
  • 2 cups gluten-free baking flour (we like Bob’s Red Mill)

What You’ll Need

Rolling Pin
Gingerbread cookie cutters

Directions

  • Mix flax meal with water and let rest for 5 minutes. This mixture will serve as our egg substitute.
  • Mix all ingredients together except the flour for 3 minutes on high. Add flour and stir with a spoon or mix with your hands. If mix is too dry, add 1 tsp. of water at a time until dough like consistency.
  • Cover with plastic wrap and refrigerate for one hour.
  • Remove the dough and preheat the oven to 350 F.
  • Cover a flat surface or cutting board and the rolling pin with gluten-free flour to prevent sticking.
  • Roll the dough out to a thin consistency (the cookies will not rise very much). Use the cookie cutters to create the shape of your gingerbread men.
  • Line a baking sheet with foil and spray with coconut oil or other cooking spray.
  • Space the cookies 1 ½ inch away from each other and bake for 10-12 minutes until lightly crisp. Let the cookies cool and use coconut whipped cream as frosting. (See our Coconut Whipped Cream recipe HERE.)

Swap-Out Makeover: Ingredient Swaps for a Healthy Winter

swap out makeover

The smallest things matter the most and in this case, small changes can make a big difference. Simple ingredient swaps this fall and winter will help you stay on track while eliminating at the feeling of indulgence guilt. Whether it’s an appetizer or a dessert, these easy changes will help you avoid that pesky holiday weight gain we all hate.

And we promise, you won’t even miss the butter or white flour, in fact, a lot of the time these substitutions will enhance the flavors of your favorite dishes. We’re here to help you make being healthy easy and we can’t wait to see what you cook up this holiday season.

pumpkin skin mask

pumpkin skin mask

Chef V

© 2021 Chef V, LLC.